 Pin it
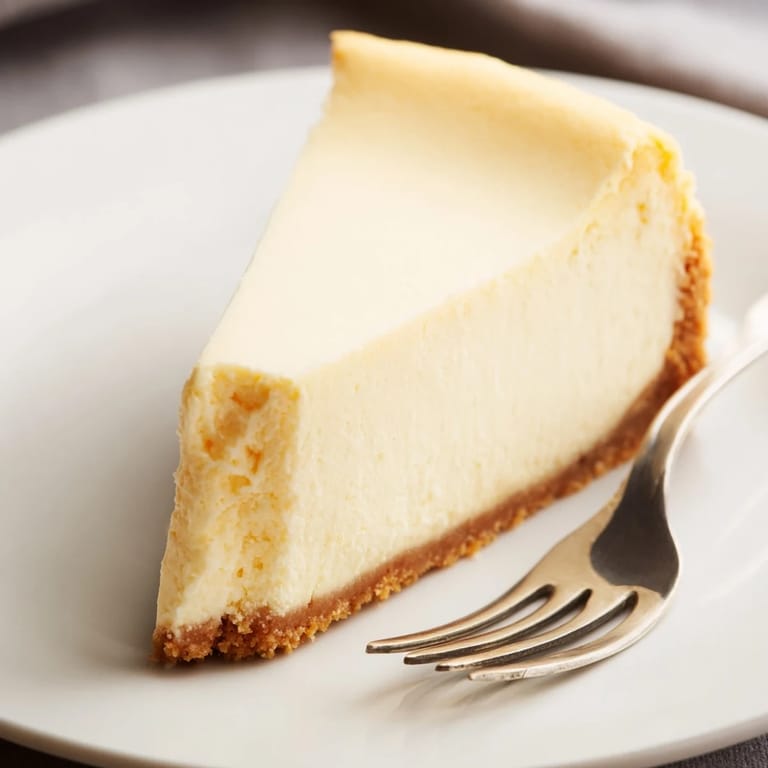
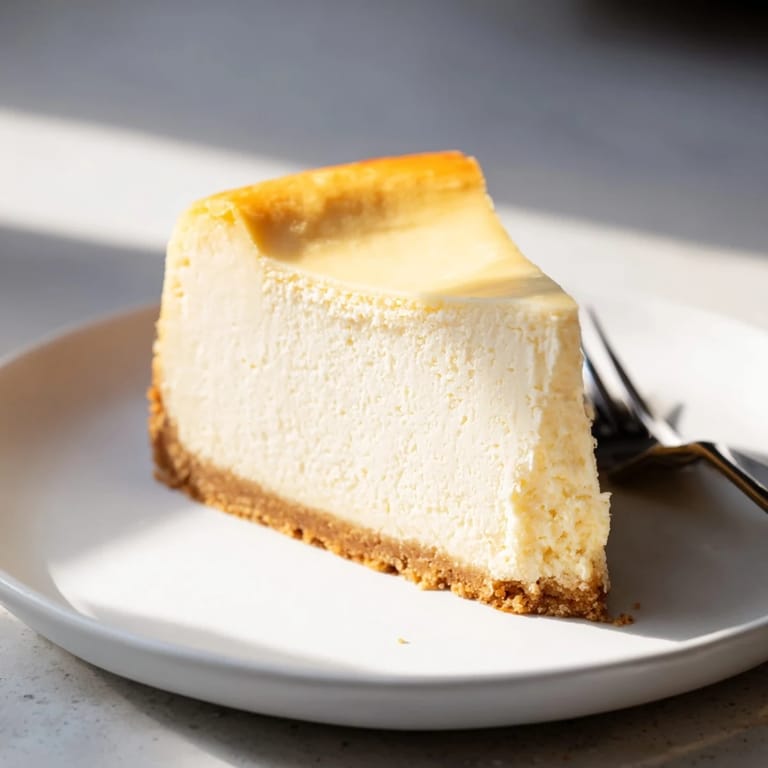
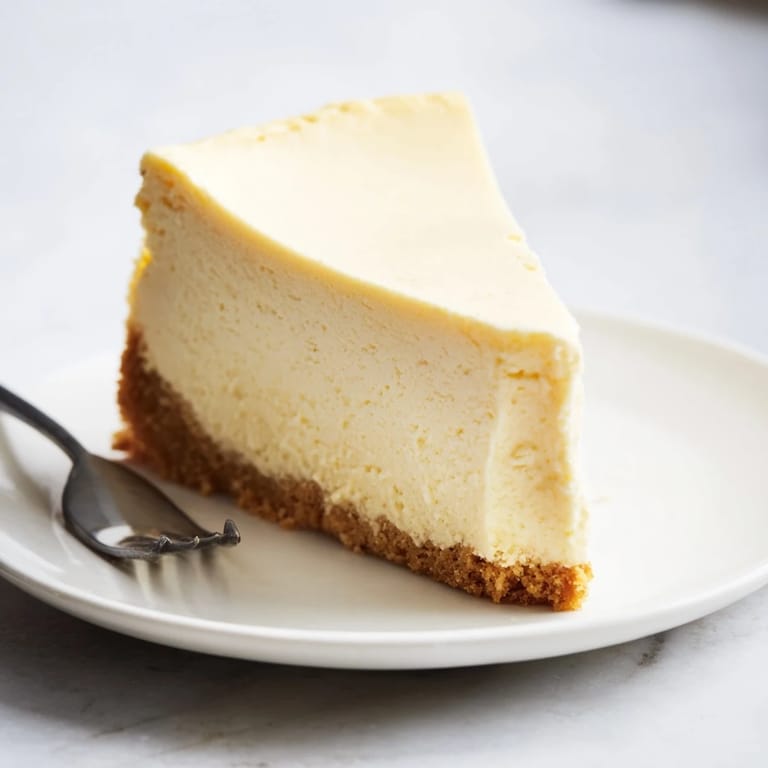
 The first time I made a proper New York cheesecake, I was terrified. I'd watched my neighbor pull one from her oven—this golden, wobbling masterpiece—and thought there was no way I could replicate that kind of magic in my own kitchen. Turns out, a cheesecake isn't actually about precision or luck; it's about patience and understanding that a slight jiggle in the center is exactly what you want. Now, years later, this is the dessert I return to whenever I want to impress someone or simply feel like treating myself to something genuinely luxurious.
I made this for my sister's birthday dinner last spring, and I'll never forget how quiet the table went after everyone took their first bite. Someone actually put their fork down and just sat there for a moment. That's when I realized cheesecake isn't really about impressing people with fancy techniques—it's about the feeling of biting into something creamy and substantial that proves you cared enough to spend seven hours on dessert.
Ingredients
- Graham cracker crumbs: Use about 14–16 full crackers crushed into crumbs, or buy them pre-crushed and save yourself the cleanup.
- Unsalted butter (melted): This is your binding agent; it makes the crust hold together without crumbling when you slice.
- Granulated sugar (for crust and filling): Don't skip the small amount in the crust—it adds subtle sweetness and helps with browning.
- Full-fat cream cheese (room temperature): Cold cream cheese will create lumps that no amount of beating can fix, so pull it out at least an hour before you start.
- Sour cream: This is your secret weapon; it prevents the cheesecake from cracking and adds a sophisticated tang.
- Large eggs (room temperature): Room temperature eggs incorporate smoothly and create a silkier crumb.
- Cornstarch: A small amount stabilizes the filling and reduces the risk of cracks.
- Pure vanilla extract and fresh lemon juice: These brighten the flavor and prevent the filling from tasting flat or one-note.
Tired of Takeout? 🥡
Get 10 meals you can make faster than delivery arrives. Seriously.
One email. No spam. Unsubscribe anytime.
Instructions
- Prepare your pan and preheat:
- Set your oven to 160°C (325°F) and grease the springform pan well, then line the bottom with parchment paper. This gentle heat is crucial—a hotter oven will crack your cheesecake.
- Make the crust:
- Combine graham cracker crumbs, melted butter, sugar, and salt until it looks like wet sand, then press it firmly into the pan. Bake for 10 minutes until it's set but not browned, then let it cool while you make the filling.
- Prepare cream cheese mixture:
- Beat room temperature cream cheese until it's completely smooth and creamy—about 2 minutes of consistent beating. This step matters more than it sounds; lumpy cream cheese will stay lumpy in the final cake.
- Add sweetener and sour cream:
- Mix in sugar, then fold in sour cream, vanilla, lemon juice, cornstarch, and salt gently. You're looking for just-combined here, not overmixed.
- Incorporate eggs carefully:
- Add eggs one at a time on the lowest mixer speed, scraping the bowl after each addition. Overmixing introduces air bubbles that cause cracks, so go slow and gentle.
- Set up the water bath:
- Pour the filling into the cooled crust, smooth the top, then place the springform pan inside a larger roasting pan. Pour hot water into the outer pan until it reaches halfway up the sides—this gentle, humid heat prevents cracks and ensures even cooking.
- Bake low and slow:
- Bake for 55–65 minutes until the edges are set but the center still jiggles slightly when you gently shake the pan. This jiggle is your indicator that it's cooked through but not overdone.
- Cool gradually in the oven:
- Turn off the oven, crack the door open, and let the cheesecake sit undisturbed for a full hour. This gradual cooling prevents the dramatic temperature shock that causes cracks.
- Final chill:
- Remove from the oven, run a thin knife around the edges, then let it reach room temperature before refrigerating for at least 6 hours or overnight. The wait is agonizing but worth it.
 Pin it
 There's something almost meditative about waiting for a cheesecake to chill. You make it, you clean up, you resist opening the fridge every five minutes, and then hours later you cut into it and taste something that feels like a small victory. It's less about the recipe working and more about proving to yourself that you can follow through on something that takes patience.
The Water Bath Matters More Than You Think
I skipped the water bath once. Just once. The cheesecake came out of the oven looking fine, but when I cut into it the next day, it had cracks running across the top like a dried riverbed. A water bath isn't just a fancy technique—it creates a gentle, humid environment that keeps the filling from drying out and shrinking too fast. The springform pan sits in a larger roasting pan filled with hot water, and that simple setup is what separates a restaurant-quality cheesecake from a disappointing one.
Beyond Plain: Variations and Toppings
Once you've mastered the basic version, cheesecake becomes a canvas. I've swirled melted chocolate through the filling before baking, topped it with fresh berries, and even drizzled it with salted caramel. The optional sour cream topping is pure luxury—it adds a subtle tang and makes the whole thing feel like a restaurant dessert. The key is restraint; let the cheesecake itself shine, and use toppings to add texture or brightness rather than overwhelm.
Slicing and Serving Like a Pro
The best way to slice cheesecake is with a long, thin, hot knife dipped in hot water and wiped clean between cuts. A cold or dull knife will drag through the filling and create a messy slice, but a hot knife cuts through like butter. Cheesecake is best served cold straight from the fridge, though I'll admit I've eaten leftover slices at room temperature with my morning coffee and been perfectly happy about it.
- Dip your knife in hot water and wipe it clean for each cut—this makes all the difference in presentation.
- Cheesecake keeps beautifully in the fridge for up to 5 days, so you can make it well ahead.
- Pairs wonderfully with coffee, late-harvest Riesling, or simply on its own as an after-dinner indulgence.
 Pin it
 A homemade New York cheesecake is proof that good things take time. Make this once, and you'll understand why people celebrate with it.
Recipe FAQs
- → What makes New York cheesecake dense and creamy?
The combination of full-fat cream cheese, sour cream, and eggs creates a rich, dense texture that is smooth and velvety when baked gently in a water bath.
- → Why use a water bath during baking?
The water bath provides gentle, even heat and moisture that prevents cracking and keeps the cheesecake creamy and smooth.
- → Can I prepare the cheesecake ahead of time?
Yes, chilling the cheesecake for at least 6 hours or overnight enhances its texture and flavor, making it easier to slice and serve.
- → What is the purpose of the graham cracker crust?
The crust adds a slightly sweet, crunchy base that contrasts beautifully with the creamy filling, contributing to the overall texture.
- → How can I add variety to the cheesecake?
Incorporate fresh berries, fruit compotes, or swirl melted chocolate into the filling before baking for subtle flavor variations.