 Pin it
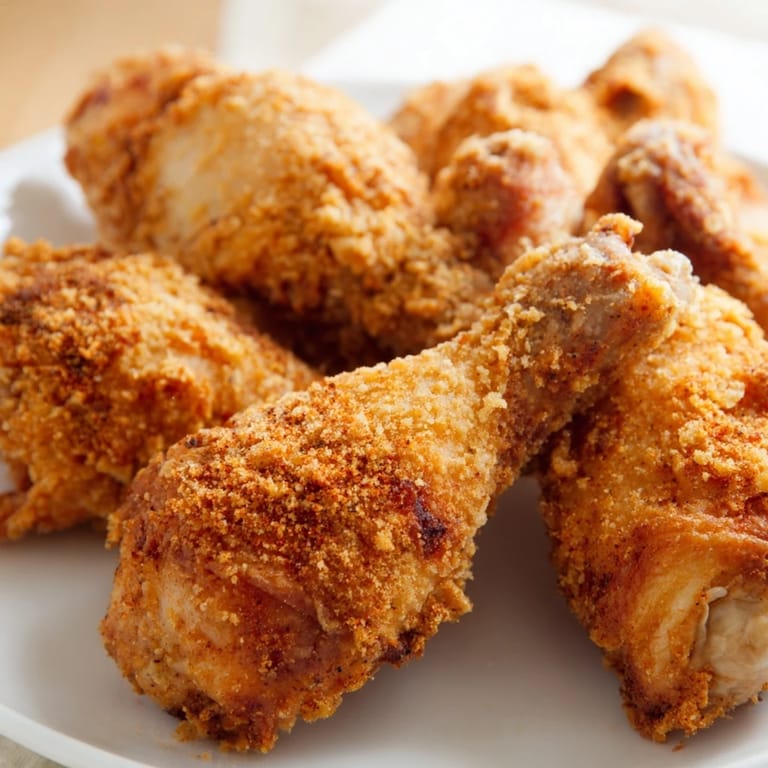
 There's something about the smell of hot oil and paprika that instantly transports me back to my grandmother's kitchen on Sunday afternoons. She'd stand at the stove with a wooden spoon in one hand and absolute confidence in the other, producing fried chicken that had neighbors asking for her secret. Years later, I realized it wasn't magic—it was buttermilk, time, and the kind of patience that made every piece emerge golden and impossibly tender. The first time I nailed it myself, I understood why this dish has stayed on tables for generations.
I'll never forget the first time I made this for a dinner party and someone asked for seconds before finishing their first piece. They weren't being polite—they genuinely couldn't believe I'd made it at home. That moment of watching someone's face light up over something you created is exactly why I keep coming back to this recipe, especially on nights when I want to impress without spending all day cooking.
Ingredients
- Chicken (1.2 kg, about 8 pieces), skin-on: Skin is non-negotiable here—it crisps up and protects the meat underneath, keeping everything juicy and tender.
- Buttermilk (240 ml): This is the secret weapon that breaks down proteins and keeps the chicken impossibly moist, even when cooked hot and fast.
- Salt (2 tsp for marinade, 1 tsp for coating): Don't skimp or combine these—the marinade salt seasons from within, while the coating salt adds flavor to every crispy surface.
- Black pepper, paprika, and cayenne (1 tsp each in marinade): These warm spices bloom in the buttermilk, building layers of flavor that soak into the meat.
- All-purpose flour (240 g): A two-cup measure gives you enough to coat generously without waste, and it creates that perfect crunch.
- Garlic powder, onion powder, dried thyme, smoked paprika (1 tsp each), plus salt and pepper: This coating blend is carefully balanced—each spice has a job, and they work together like a team.
- Vegetable oil (1 liter): You need enough oil to let the chicken swim, not crowd it, so temperature stays steady and browning happens evenly.
Tired of Takeout? 🥡
Get 10 meals you can make faster than delivery arrives. Seriously.
One email. No spam. Unsubscribe anytime.
Instructions
- Create the buttermilk bath:
- Whisk together buttermilk, salt, black pepper, paprika, and cayenne in a large bowl. The mixture should smell warm and inviting, with spice notes that make you pause and inhale. Add chicken pieces, turning to coat every surface, then cover and refrigerate for at least 2 hours—overnight is even better, when the marinade really penetrates the meat and transforms it from ordinary to extraordinary.
- Mix the coating blend:
- In another bowl, whisk together flour, garlic powder, onion powder, dried thyme, smoked paprika, salt, and pepper. Take a moment to smell this mix—that's what's about to coat your chicken, so make sure it smells like something you want to eat.
- Dredge the chicken:
- Pull chicken pieces from the marinade one at a time, letting excess buttermilk drip back into the bowl. The wetness helps the flour stick, which is exactly what you want. Press each piece firmly into the seasoned flour, working it in with your hands so the coating adheres and doesn't fall off in the oil.
- Let the coating set:
- Place coated chicken on a wire rack and give it 10 minutes to rest. This brief pause lets the flour hydrate slightly and bond with the surface, ensuring a crust that doesn't shed. You can use this time to get your oil ready.
- Heat the oil:
- Pour oil into a deep fryer or large heavy pot and bring it slowly to 175°C (350°F). Use a thermometer and trust it—oil that's too cool makes greasy chicken; oil that's too hot burns the outside while leaving the inside raw. When the oil is ready, a small piece of coating should sizzle immediately and float to the surface.
- Fry in batches:
- Gently lower chicken pieces into the hot oil, working in batches so you never overcrowd the pan—crowding drops the temperature and steams the chicken instead of crisping it. Fry for 12–15 minutes, turning occasionally with tongs, until the exterior is deep golden brown and a kitchen thermometer reads 75°C (165°F) in the thickest part of the thigh. Listen for the sizzle; when it quiets slightly, that's usually a sign the chicken is done.
- Drain and rest:
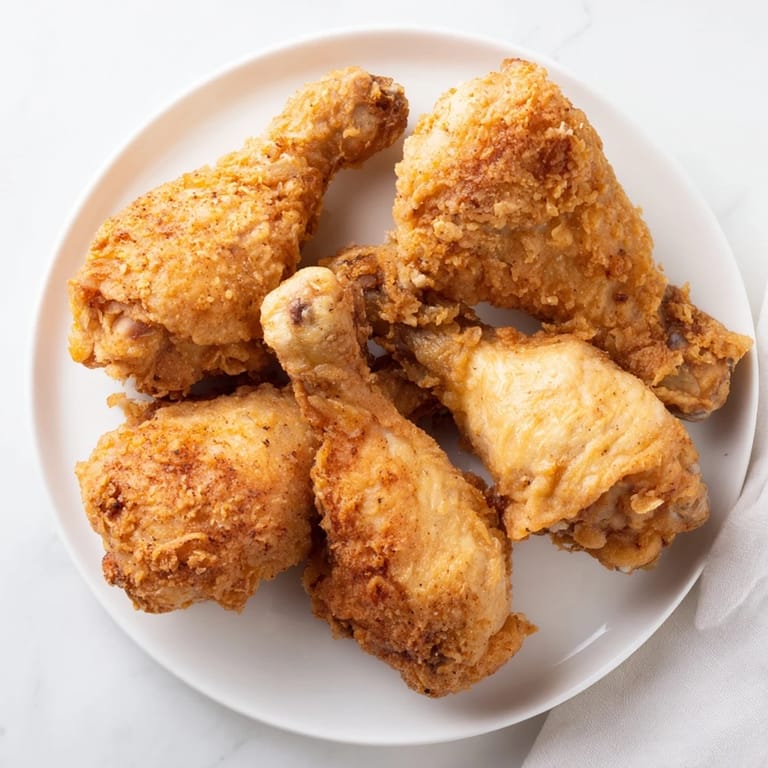
- Transfer fried chicken to a wire rack or paper towel-lined plate. Resting for 5 minutes lets the exterior stay crispy while the interior settles, and any excess oil drains away. Serve warm, while that crackle is still at its peak.
 Pin it
 The moment that made me fall in love with this recipe wasn't a dinner party or a special occasion—it was a Tuesday night when someone I care about was having a rough week. I made this chicken without any fanfare, and they ate it quietly, with the kind of focus people only bring to food that makes them feel seen. That's when I realized this dish isn't just about technique or flavor; it's about care.
The Double-Dip Secret
If you're chasing that restaurant-quality crispness, the double-dip method is worth the extra step. After your first flour coating, return the chicken to the buttermilk for a quick dunk, then dredge in flour again. This creates layers—a thin, humid middle layer that traps moisture, and an outer crust that gets impossibly crunchy. The first time I tried this, I thought I was overthinking it, but the result was chicken with shattered, shattering crust that somehow stayed moist inside. It's the kind of technique that feels complicated until you realize it's just repetition with intention.
Building Flavors That Last
The magic of this recipe lives in the combination of the wet marinade and the dry coating. The buttermilk base is gentle but effective, seasoning the meat from inside while the flour-spice blend builds flavor on the surface. Some recipes skip one or the other, but that's where they lose depth. I've learned that layering seasoning—salt and paprika in the marinade, then garlic, thyme, and smoked paprika in the coating—creates chicken that tastes interesting in every bite, not just at the surface. It's not about more salt or more spice; it's about putting different flavors in different places so they work together.
Serving and Storage
Fried chicken is best eaten within a few hours of frying, when the contrast between crispy exterior and tender interior is most pronounced. That said, I've reheated leftovers in a 175°C oven for about 10 minutes and been genuinely surprised at how well they hold up—not quite the same, but still miles better than most takeout. The coating doesn't stay shattered-crispy if you refrigerate it, so if you're making this ahead, embrace that softer texture rather than fighting it. Some of the best meals I've had have been cold fried chicken straight from the fridge at midnight, so don't dismiss the leftovers if you have them.
- Serve hot with coleslaw and hot sauce, or pair with mashed potatoes and gravy for pure comfort.
- If you're using boneless chicken, shorten frying time to 8–10 minutes since there's less mass to cook through.
- Keep a thermometer handy and don't trust your eyes alone—the color can fool you, but temperature never does.
 Pin it
 This recipe has earned its place on my table not because it's fancy, but because it works—every time, without fail, if you follow it. More than that, it's taught me that sometimes the most meaningful cooking is the simplest kind, the food that makes people happy and brings them back for more.
Recipe FAQs
- → How do you achieve extra crispy chicken?
Double-dip the chicken by coating it in flour, then buttermilk, and flour again before frying. This builds a thicker, crunchier crust.
- → What is the ideal oil temperature for frying?
Heat the oil to 175°C (350°F) to ensure the chicken cooks evenly and the coating turns golden and crispy without burning.
- → Can different chicken cuts be used?
Yes, drumsticks, thighs, or assorted pieces with skin-on work best to maintain juiciness and crispiness during frying.
- → How long should the chicken marinate?
Marinating for at least 2 hours, preferably overnight, allows the flavors to fully penetrate the meat, enhancing taste and tenderness.
- → How do you know when the chicken is cooked through?
Cook until the internal temperature reaches 75°C (165°F), ensuring it's safe to eat and perfectly juicy inside.