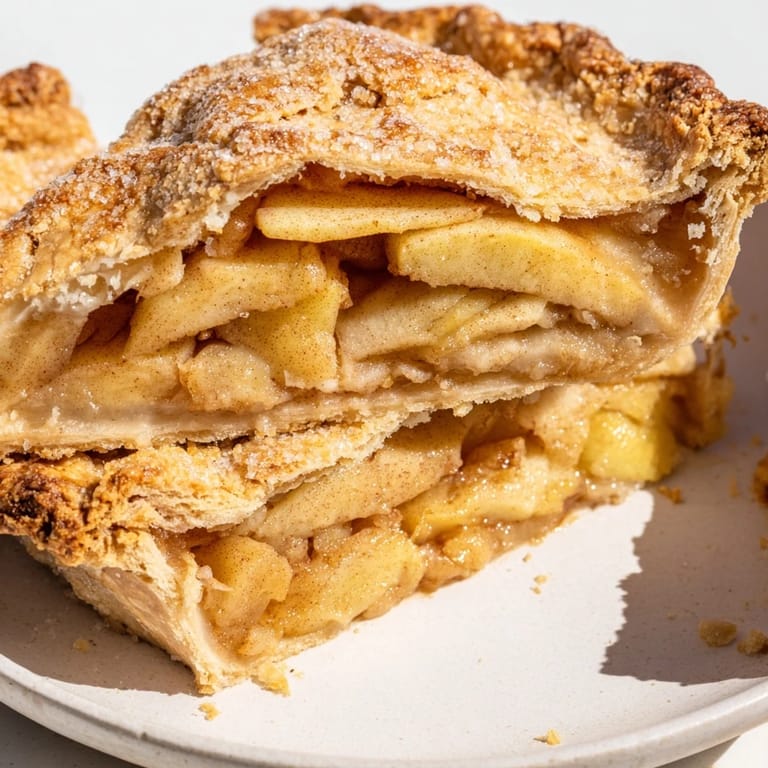
 Pin it
 My grandmother always said that a good apple pie was the truest way to know if someone understood patience in the kitchen. Years later, standing at her old wooden counter with flour dusting my apron, I realized she meant something deeper—not just the waiting, but the small decisions you make along the way: which apples to pick, how cold the butter stays, the moment you know the crust is done. This pie, with its tender spiced apples wrapped in a golden, flaky crust, became my own quiet meditation on getting things right.
I made this for my neighbor Tom one October afternoon, and he ate a slice while leaning against my kitchen counter, not saying much except that it reminded him of somewhere safe. He came back three times that week asking if I'd made another one. That's when I understood—a great apple pie isn't really about impressing anyone, it's about giving them permission to sit still for a while.
Ingredients
- All-purpose flour (2 1/2 cups): The foundation of everything; make sure it's fresh because old flour can feel heavy and stale.
- Unsalted butter (1 cup, cold and cubed): This is non-negotiable—keep it in the freezer until the last moment, because warm butter betrays all your good intentions.
- Ice water (6–8 tbsp): Add it slowly and resist the urge to overwork the dough; you're aiming for a shaggy texture, not a smooth ball.
- Mixed apples (6–7 medium): Granny Smith and Honeycrisp together create a balance—tart and sweet—that feels complete.
- Brown sugar and granulated sugar (3/4 cup and 1/4 cup): The blend gives you depth; pure white sugar can taste one-note.
- Cinnamon and nutmeg (1 1/2 tsp and 1/4 tsp): Measure carefully here because too much nutmeg tastes like medicine, but just enough feels like home.
- Lemon juice (1 tbsp): It cuts through the sweetness and makes the apple flavor ring clearer than you'd expect.
Tired of Takeout? 🥡
Get 10 meals you can make faster than delivery arrives. Seriously.
One email. No spam. Unsubscribe anytime.
Instructions
- Make the crust come alive:
- Whisk flour, salt, and sugar together, then work in cold butter cubes with a pastry blender or your fingertips until everything looks like breadcrumbs. Add ice water a few tablespoons at a time, stirring gently until the dough just comes together—it should still feel slightly shaggy and loose.
- Let the dough rest and chill:
- Shape your dough into two disks, wrap them in plastic, and refrigerate for at least an hour while you prepare everything else. This resting period is where the magic happens; cold dough is patient and forgiving.
- Prepare your apples:
- Peel, core, and slice your apples about 1/4-inch thick, then toss them in a large bowl with both sugars, spices, flour, and lemon juice. Let them sit while you work on the crust—they'll release their juices and soften slightly.
- Roll and fit the bottom crust:
- On a floured surface, roll one disk into a circle large enough to fit your 9-inch pie dish. Transfer it gently into the dish, letting the edges hang slightly over the rim.
- Fill with tender intention:
- Pour the apple mixture into the crust, mounding it slightly higher in the center, then dot the top with small pieces of butter. This little bit of butter melts through and makes the filling richer than you'd imagine.
- Top and seal:
- Roll out your second dough disk and drape it over the filling. Trim the excess dough, then press the edges together and crimp them with a fork or your thumb for a rustic look. Cut a few small slits in the top to let steam escape.
- The final gloss:
- Whisk an egg with a splash of milk and brush it all over the top crust, then sprinkle with coarse sugar if you have it. This gives you that glossy, golden color that looks like you know what you're doing.
- Bake until golden:
- Place the pie on the lower rack at 400°F and bake for 45–55 minutes, until the crust is deep golden and you see the filling bubbling at the edges. If the edges brown too fast, cover them loosely with foil.
- Cool with patience:
- Let the pie rest on a wire rack for at least 2 hours before slicing. This isn't wasted time—the filling sets, the flavors deepen, and you get clean, beautiful slices.
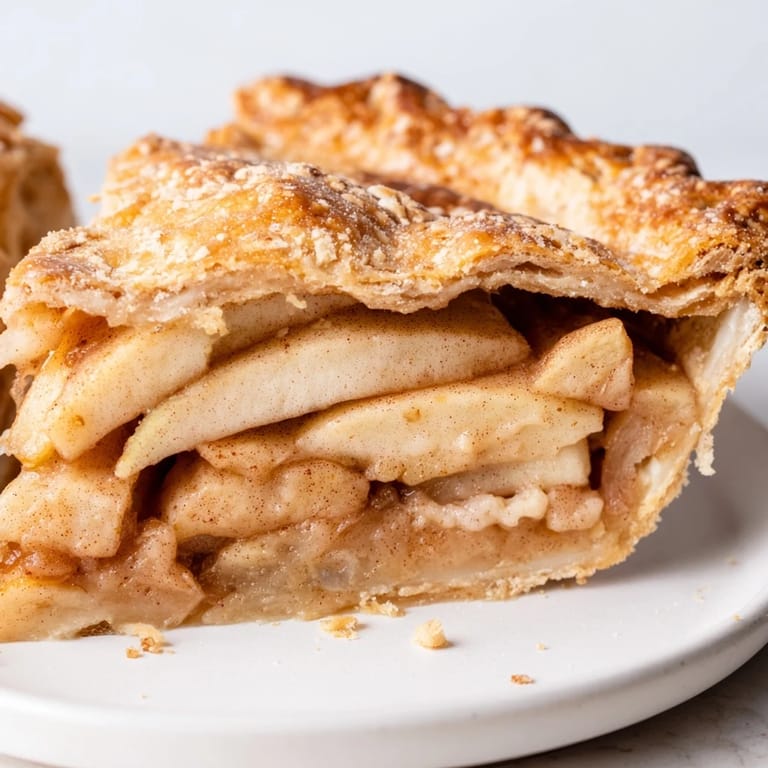 Pin it
 The smell that fills your kitchen while this bakes—that combination of cinnamon, butter, and caramelizing apple juice—is the kind of thing that makes people pause at your door and ask what you're making before they even see it. It's the smell of being taken care of.
Choosing Your Apples
The apple situation deserves its own conversation because it changes everything. Granny Smith apples are sharp and keep their structure through baking, while Honeycrisp apples are sweeter and break down into a softer filling—together they create a texture and flavor that neither one could manage alone. If you can only find one type, you're not ruined, but you lose that beautiful balance. Some people swear by Pink Lady or Cortland apples too, and honestly, there's room for experimentation here. The important thing is that your apples taste good fresh; if they're mealy or bland, they'll taste that way in your pie. Hit the farmer's market if you can and pick apples that smell like apples.
The Butter Cold Strategy
Here's something I wish I'd known sooner: you can make your crust ahead and freeze it, and sometimes that's actually better than rushing it. If you shape your disks and freeze them overnight, the dough relaxes and the gluten quiets down, which gives you an even more tender final crust. You can roll it straight from the freezer—it might take an extra minute or two and might crack at the edges, but those cracks don't matter because you'll seal them in the pie dish. The crust wants to be lazy; let it be lazy.
Serving and Storage
A slice of apple pie tastes different warm with melting vanilla ice cream on top than it does at room temperature, but honestly both versions are right. Room temperature feels more like you made it as a gift, while warm straight from the oven tastes like an indulgence. The pie keeps beautifully covered at room temperature for a couple of days, and if you need it to last longer, it lives in the fridge for about a week. You can also freeze a baked pie for a month, and honestly, sometimes having one in the freezer feels like having a small miracle waiting.
- Serve it with a good coffee or a glass of something slightly sweet like Riesling, and don't apologize for a second slice.
- If the crust edges brown faster than the filling bakes, aluminum foil is your friend—just drape it loosely over the edge.
- The pie is done when the crust is deep golden and you see filling actively bubbling at the edges, not just when the crust looks golden.
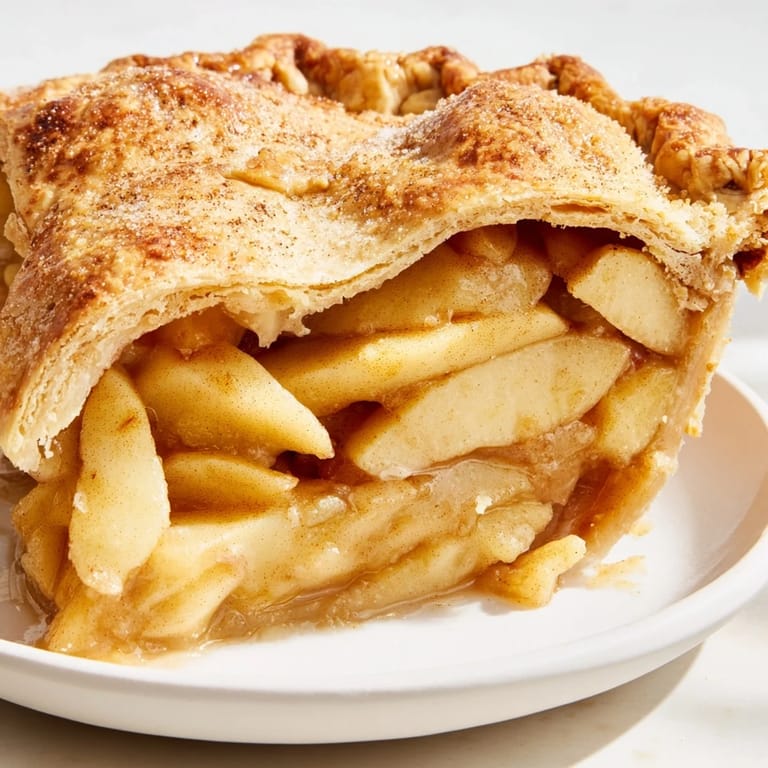 Pin it
 In the end, this pie is just apples and butter and flour, but somehow those simple things, treated with a little care and patience, become something that makes people feel held. That's the real magic here.
Recipe FAQs
- → What apples work best for this dish?
A mix of Granny Smith and Honeycrisp apples balances tartness and sweetness, providing ideal texture and flavor.
- → How do I ensure a flaky crust?
Use cold unsalted butter cut into the flour mixture and minimal water just until dough forms; chill before rolling out to maintain flakiness.
- → Can I customize the spice blend?
Yes, cinnamon and nutmeg can be adjusted or complemented with a pinch of ground ginger or cloves for additional warmth.
- → What is the purpose of the egg wash?
Brushing the top crust with egg wash and milk creates a glossy, golden-brown finish and helps coarse sugar adhere.
- → How long should it cool before serving?
Let the pie cool at least 2 hours on a wire rack to allow filling to set, ensuring clean slices and optimal texture.